Pages

Thursday, 10 October 2013

Recipe: Jerk Chicken with Pineapple-Coriander Rice

Jerk Chicken

Chicken thighs (bone out and skin off)
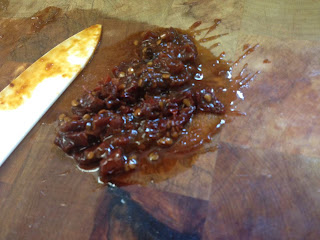
Jerk seasoning - I use Walkerswood jerk seasoning 'hot and spicy'
Bbq sauce

In a bowl or a resealable bag place chicken thighs, 1 - 2 tbs jerk seasoning and a few squirts of bbq sauce. Massage into the chicken and set aside for 1 hour or more to marinate. 


When you're ready to cook place the marinated chicken thighs into an oven dish and fan bake uncovered at 200 degrees Celsius for 30 minutes or until cooked. You don't want the chicken to dry out so do cover it if it looks like it's getting a bit crispy on top. 

Pineapple-Coriander rice

Oil
1 cup rice (I use basmati)
Jerk seasoning
1 small tin of crushed pineapple in natural juice, drained but retain the juice
Coriander, finely chopped (coriander is also known as cilantro)
Chicken stock (low salt)

Squirt some oil into a medium saucepan and turn your stove to medium heat. Place 1 tsp of the jerk seasoning and the rice into the saucepan, stirring around and allowing it to toast until the rice is golden brown and the spices are fragrant. Add the chicken stock and pineapple juice you reserved from the tinned pineapple. You will need 2 cups of liquid altogether. Add the tin of drained pineapple and the chopped coriander. Allow the rice to come to the boil, give it a couple of stirs and then reduce the heat to low and place the lid on. Set your timer for 12 minutes. When your timer bings take the pot off the stove and allow the rice to continue to steam for a further 12 - 15 minutes. Resist taking the lid off to check!! Fluff your rice up with a fork before serving, taste test for salt and add if needed. You can sprinkle some more chopped coriander on top if desired. 

Monday, 7 October 2013

My Thai food obsession continues

Thai Red Curry

On Thursday night my husband was out for a work dinner. I took the opportunity to make up a new recipe (although upon further investigation it seems others have done similar recipes) using thai red curry paste, coconut cream and chicken breasts. I didn't want to do the usual cooking style for red curry (in a pot) so I decided to see if it would work in the oven. I placed the red curry and coconut cream in a jug and gave it a good stir. I placed the chicken breasts in an oven dish, poured the coconut curry mixture over the top and placed the whole lot, uncovered in the oven (preheated to bake, 200 degrees). After 20 minutes I turned the chicken and basted it with the surrounding sauce. After a further 20 I checked the chicken and it was done. The results were good! The chicken was really moist and the sauce was delicious. I had the red curry on its own with a piece of roti I may or may not have forgotten I was heating up in the oven. Fun fact: roti becomes flakey pastry when left to crisp up in the oven.... yeah, don't do this.


Thai Red Curry Pizzas


I had some left over chicken in red curry sauce from Thursday night so I decided to use it up in a red curry pizza. Unusual I know, but surprisingly delicious! I spread some of the curry sauce on the bases, then layered up sliced cooked chicken breast (from the curry), finely sliced red peppers, coriander, spring onion, fresh chilli. Then I poured a tablespoon of sweet chilli sauce into a ramekin and thinned it with a bit of water and drizzled this over the pizzas. Finally I finished everything off with some grated cheese. I popped the pizzas in the oven on fan bake at 200 degrees Celsius for 15 minutes until everything was piping hot and the cheese was melted. Yummy!

Wednesday, 2 October 2013

Recipe: Pad Thai

I love pad thai. Love. Love. LOVE! I ate it all over Thailand on our honeymoon and it's my most favourite take-away choice. However I've never had much luck making it at home. The first recipe I tried was an easy cheats pad thai which tasted like very nice fried noodles but nothing like pad thai. Last week we went to the Sunday market by Te Papa and I saw a woman selling all kinds of curry pastes and sauces. I bought a tom yum paste, some tamarind sauce and a red curry paste. The tamarind is something I've never cooked with but I know is a vital pad thai ingredient. So I went to the supermarket to grab all the ingredients I needed and based my recipe off this one.


Pad Thai: a recipe tweaked by me but inspired by the one linked above.

Serves 2 - 3


120g 2-3mm wide flat rice sticks
60ml fish sauce
60ml tamarind water (you can use tamarind concentrate/sauce, thinned with a little water)
60g palm sugar
Fresh chilli, chopped, to taste
80ml groundnut or vegetable oil
2 cloves of garlic, finely chopped (I used 4)
200gm skinnless chicken breast, finely sliced
2 large eggs, ready cracked
100g beansprouts (mung beans)
2 - 3 spring onions (scallions), sliced diagonally
Fresh coriander (cilantro), to taste50g roasted peanuts, roughly chopped
Lime wedges, chilli, fish sauce and sugar, to garnish
Soak the rice sticks in hot water for about 10 mins until they are pliable. You'll know they are ready when you can wrap a strand around your finger. Drain and set aside.


Make the sauce by combining the fish sauce, tamarind and palm sugar in a small pan. Heat gently to dissolve the sugar and taste – add more of any of the ingredients as you wish. Strain if you've used tamarind paste as there will be some tamarind pulp and bits of seed left behind which aren't lovely to eat. Set aside until you're ready to use.


Make sure the ingredients are all ready for you to grab as you'll be working fast from now on. 


Put a wok (I used a fry pan) on a high heat and add half the oil. Add the garlic and whites of the spring onion, stir fry for a few seconds, then add the noodles and a splash of water. Stir fry until they're drying out, then add the sauce. Fry until they are almost soft enough to eat (they should be slightly chewy).


Push the noodles to the side of the wok and add the rest of the oil. Fry the chicken until it is beginning to colour, then push to the side and add the eggs. When the eggs are starting to set on the bottom, scramble.


Stir through the noodles, and add the beansprouts, fresh chilli, green part of the spring onions, coriander and peanuts. Stir fry until well combined, then serve with the garnishes for people to add as they wish.


I found this ended up to be just right for my taste. My husband was a lot less keen and felt it was too heavy on the fish sauce. Which he told me, after I'd been in the kitchen quite a while making this for our dinner and subsequently ended up with an ear bashing. Which I later apologised for but not until I'd dissolved into giggles hearing him blasting protest songs from his man cave (where he'd holed up in protest of free speech.) 

Pad thai is a very subjective dish so do tweak it to your own taste (and maybe your husbands?!) Make sure you taste as you go along so you can adjust and balance the sweet, salty and spicy flavours. You don't want to end up with a stand off as we did in this house.

Sunday, 29 September 2013

Restaurant Review: Hippopotamus

My wonderful husband surprised me with a night at the Museum Hotel and dinner at Hippo. It was spectacular. We had visited twice before but it had been a couple of years between visits. In fact, our last visit was the night we got engaged so it was quite the blast from the past!

We started with a cocktail in the bar before we were seated. There was a small but well formed cocktail list and we enjoyed ours. 


Shortly after being seated the sommelier pushed a champagne trolley to our table and asked if we'd like some champagne or a champagne cocktail. We went for the champagne cocktail, which he made in front of us and was delicious. 


Our orders were taken and bread was offered shortly after that. I had a nice walnut roll. My entree was the special of the day, a 46 degree salmon that was meltingly lovely. My husband had the pork shoulder which was wrapped in filo pastry. He seemed to enjoy it too.


My main was the fillet of beef which came with braised short rib and a very tender braised beef cheek. It was yummy but very rich, I only managed half before sending it to my husband. He had the venison which was served with beetroot and was exceptional, definitely the dish of the night. We also ordered a side of truffled chips but we didn't eat many as the mains were enough. 


We asked the sommelier to choose our wines to match each dish and he did an excellent job. He explained each wine before pouring and each one worked beautifully with each course. We didn't have pudding as were too full.

This is not an everyday place (unless you can afford it!) but perfect for those extra special occasions. We look forward to coming back in another few years.

Sunday, 1 September 2013

Bircher Muesli

Bircher Muesli: I was inspired by this recipe by My Little Gourmet

Ingredients

  • 2 cups/150g quick oats
  • 1¾ cups/420ml milk
  • ¼ cup/60ml apple juice
  • 3 tablespoons lemon juice
  • 1 apple, cored and grated with the peel
  • 1-2 tablespoons honey
  • 1½ cups/375g plain yogurt (I used The Collective's pouring honey yogurt
  • 1/4 cup of coconut
  • 1 peeled orange, chopped into small pieces
  • Prunes/raisins/sultanas to taste

Method

  1. Combine all ingredients in a bowl, let sit over night. Enjoy. 

Easy peasy, healthy and delicious. This recipe is enough for 4 - 6 servings. 


Chilli Con Carne


Chilli Con Carne - a recipe by taste.com.au but modified by me

Ingredients:

1 - 1.5kg of chuck steak or any kind of casserole steak
Olive oil
2 brown onions, finely diced
2 cloves of garlic, finely chopped
1 tablespoon Worcestershire sauce
2 tablespoons brown sugar
1 tablespoon ground cumin
1 tablespoon smoked paprika
2 chipotle chillis in sauce, diced (optional, you can use regular chilli or chilli powder)
1 can of tomatoes (I like Indian flavour)
1 can of black beans with jalepeno (optional)


Chop and brown the meat in olive oil. Place into slow cooker and turn slow cooker onto high.


Add onion and garlic into same pan you browned the beef in. Reduce saucepan heat to medium/low.


Add chipotle (if using)

Add cumin, paprika, brown sugar and Worcestershire sauce to the onions and garlic. Allow to cook until thick and sticky, about 5 minutes. Add to slow cooker.


In the same pan add the canned tomatoes, and raise the heat to medium/high. Allow tomatoes to bubble, and scrape all the yummy charred bits off the bottom of the pan.


Add the can of black beans (if using) and heat through.


Add to the slow cooker, give everything a good mix around and leave to cook.


Cooking times: 4 hours on high, 8 hours on low or 3-4 hours on 150 degrees celcius if cooking in the oven. 

Slow Cooked Moroccan Lamb Casserole

Slow Cooked Moroccan Lamb Casserole Recipe - a recipe by me

  • 1kg lamb suitable for casserole/slow cooking, chopped into large chunks
  • 1 large onion roughly chopped
  • 3 cloves garlic chopped
  • 10 - 15 pitted dried dates
  • 2 tablespoons Moroccan spice mix
  • 1 can chopped tomatoes
  • Slug of red wine, approximately 1/2 cup
  • Salt
  • Pepper
  • Sweet potato or potato (optional) cut into chunks

  1. Chop the lamb into large chunks. Place into large freezer bag or bowl ready to marinate.
  2. Chop onion, garlic, dates, potatoes (if using) and add to the bag or bowl with the lamb.
  3. Add 2 tablespoons of your favourite Moroccan spice mix, plus salt and pepper to taste to the bag and massage into the lamb and other ingredients.
  4. Add the can of tomatoes and wine to the bag/bowl, mix and set aside to marinate in the fridge for at least an hour.
  5. Preheat the oven to 150 degrees Celsius.
  6. Once the ingredients have marinated for a suitable length of time, transfer into a dutch oven.
  7. Cook for 3 hours but check the lamb every hour or so and give it a stir. The lamb should be falling apart when it is ready and the sauce should be thick.
  8. Serve with couscous, I like Israeli couscous.